Select a truss to be added or edit the truss library in the dialog box. You can only edit customer-specific libraries in the custom/complibs/trusses folder.
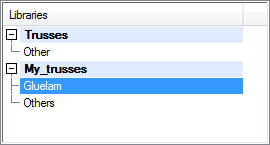
Libraries
You may have several libraries available. The trusses are grouped by selection groups in the libraries. Select a library and a selection group from the list in the top left-hand corner of the dialog box. You can search for a library by activating the list box and pressing Ctrl+F. Enter the character string to be searched for in the text box. If you wish to collapse or expand all libraries, right-click to open the context-sensitive menu and select Expand all or Collapse all.
You can create a new or delete an existing customer-specific truss library.
![]() Creating a New
Library
Creating a New
Library
![]() Editing a Library
Description
Editing a Library
Description
![]() Selecting the
Available Libraries
Selecting the
Available Libraries
![]() Deleting
a Library
Deleting
a Library
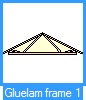
Thumbnail images of the trusses are displayed below the list box.
Trusses
Select the thumbnail image of the truss to be added in the bottom left-hand corner of the dialog box. You can search for a truss by activating the list box and pressing Ctrl+F. Enter the character string to be searched for in the text box.
The selected truss will be displayed in a preview window.
![]() You can only edit the trusses in the
customer-specific library in the custom/complibs/trusses
folder.
You can only edit the trusses in the
customer-specific library in the custom/complibs/trusses
folder.
If you have created a new library, you can add a first truss in the library in the following ways:
Model a truss
Model a truss on a work plane and save it in the library.
Copy a truss
Copy a truss from an existing library. You can copy a truss from any library, including the system library.
You can then add, copy or move other trusses to the library.
![]() Creating a New
Component in the Library
Creating a New
Component in the Library
![]() Moving a
Component from One Library to Another
Moving a
Component from One Library to Another
![]() Editing the
Library Data of a Component
Editing the
Library Data of a Component
![]() Deleting a
Component from the Library
Deleting a
Component from the Library
![]() Representation of
Thumbnail Images
Representation of
Thumbnail Images
You can edit a truss saved in the library by opening a truss in a building model and editing the parts on a work plane. You can save the edited truss in the library with the same or a new name.
![]() Editing a Truss Added to the
Library on the Work Plane
Editing a Truss Added to the
Library on the Work Plane
Save to Library
Save the truss displayed in the preview window to the library. Use this function if you have modeled a new truss or edited an existing truss on a work plane. Define the library data of the truss in the Truss Library dialog box.
If a truss exists with the same name, you will be prompted: Replace it? Select either of the following:
Yes - The truss will replace the old truss with the same name.
No - You can rename the truss in the Truss Library dialog box.
Properties
Select a new cross section or edit other properties of the truss as follows:
Select the parts you wish to edit in either of the following ways:
Press and hold the Ctrl key and click the parts in the preview window.
Select all parts by clicking the Select all button.
Click the Properties button. The Part Properties dialog box opens.
Edit the properties in a dialog box.
Confirm by clicking OK.
The changes are saved when you exit the Truss Structure dialog box by clicking the OK button.
Show only profiles
When the check box is selected, the preview image only shows the truss parts, not the truss volume.
| Converted from CHM to HTML with chm2web Pro 2.85 (unicode) |