Saving a Truss to the Library
After you have modeled a truss, you can save it to the truss
library. You can only save trusses to a customer-specific library.
First create the library, see Creating a New
Library.
- Activate the model window where the truss is.
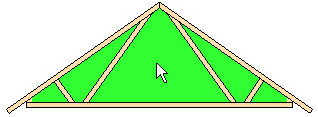
- Select the truss volume you have modeled the parts to.
- Right-click to open the context-sensitive menu.
- Select
 Generate Parts. The Truss Structure
dialog box opens. The parts of the modeled truss are displayed in
the preview window.
Generate Parts. The Truss Structure
dialog box opens. The parts of the modeled truss are displayed in
the preview window.
- Select a customer-specific library from the Libraries list. The
Save to library button is activated.
- Click Save to library. The Truss library dialog box
opens.
- Define the library data of the truss in the dialog box.
 Library Data of a
Truss
Library Data of a
Truss
If a truss exists with the same name, you will be prompted: Replace
it? Select either of the following:
- Yes - The truss will replace the old truss with the same
name.
- No - You can rename the truss in the Truss Library
dialog box.
- Confirm by clicking OK.
Modeling a
Truss
Editing a Truss
Added to the Library on the Work Plane
Editing Truss Library
 Truss Libraries