Adding a New Main Height Level
Add a new main height level as follows:
- Move the cursor over the project id in the document
browser.
- Right-click to open the context-sensitive menu.
- Select Edit 3D Levels. The 3D Levels dialog box
opens.
- In the height level list, right-click to open the
context-sensitive menu.
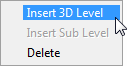
- Select Insert 3D Level.
- Enter a Name for the height level.

 The project's PARAMETERS file may contain
pre-defined parameter sets which refer to height levels not yet
added to the project. If you wish to take advantage of the
pre-defined parameter sets, you can use the name of such a height
level. Notice however, that a height level existing in the
PARAMETERS file cannot be renamed or deleted in the 3D Levels
dialog box.
The project's PARAMETERS file may contain
pre-defined parameter sets which refer to height levels not yet
added to the project. If you wish to take advantage of the
pre-defined parameter sets, you can use the name of such a height
level. Notice however, that a height level existing in the
PARAMETERS file cannot be renamed or deleted in the 3D Levels
dialog box.
- Select the Type of the height level. Select Floor
for a main height level.

- Enter the Height of the height level. The height value
of a main height level is presented in relation to the absolute
origin of the model.

- If necessary, select a floor structure from the list of the
Floor or ceiling field.

If you add a sub height level for a main height level, the
default height of the sub height level is determined by the
thickness of the selected structure.
- Confirm by clicking OK.
 Adding a New
Sub Height Level
Adding a New
Sub Height Level
Selecting a Horizontal
Structure for a Main Height Level
Renaming a Height Level
Deleting a Height Level
 Defining Height Levels