Continue a Line from the End of a Pipe/Duct
Continue a routing a line from the end of a pipe/duct. The
pipe/duct information is determined by the selected grip point.
Continue the line with the same kind of part.
- Do either of the following:
- Select
 Pipings > Add Pipe
Line.
Pipings > Add Pipe
Line.
- Select Pipings >
 Add Duct
Line.
Add Duct
Line.
- You can continue the line as a linear line by selecting Lock
to handle direction.

- Select either of the following:
- Continue the line as a continuous line. Clear the checkbox
Pipe seam.

- Continue the line as a jointed line. A new pipe is created.
Select the checkbox Pipe seam.

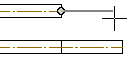
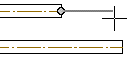
- Move the cursor near the grip point of the pipe/duct. The
cursor snaps to the grip point. Select the grip point.

- Do either of the following:
- Use the keyboard to enter the distance for the next point.
- Click the point in the floor plan.
- Continue adding the line. For example: move the cursor in the
direction of the pipe/duct and click a point.
- You can lengthen the pipe/duct (A).
- You can shorten the pipe/duct (B).
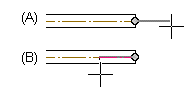
- You can change the direction.
- Select Confirm.
- Quit by pressing the Esc key.
 Note
Note
- You can also use the Alt key to create a jointed pipe/duct.
With pipe line addition selected, do as follows:
- Press the Alt key.
- Click the grip point of a pipe/duct.
- Release the Alt key.
- Pressing the K key shows the directions of the coordinate axes
at the cursor.
 Continue a Line
from a Component
Continue a Line
from a Component
Continue a Line with a Branch
Component
Continue a Pipe Line with a
Set-on
 Auxiliary Functions when
Adding a Pipe or Duct Line
Auxiliary Functions when
Adding a Pipe or Duct Line