|
Piping Design |
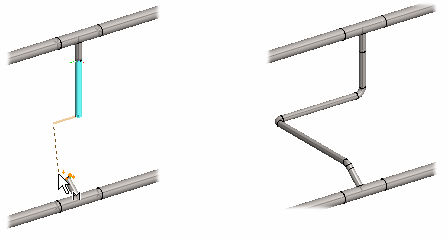
You can automatically route a pipe or duct line to the end once you have clicked the starting point of the line and specified the initial direction of the routing.
The software tries to generate the line with a preference for perpendicular direction changes, taking the directions of the model's main axes and the grip points at the starting and ending points into consideration.
The benefits of automatic routing are greatest in situations where the component determining the pipe or duct line's ending point is positioned at an indeterminate angle and position with regard to the pipe's/duct's direction of approach.

Route the pipe or duct line as follows.


For example, click at least two points on the line. If necessary, click more points, depending on how far you wish to add the pipe/duct manually.
![]() Route Pipe or
Duct Line
Route Pipe or
Duct Line
![]() Auxiliary Functions when
Adding a Pipe or Duct Line
Auxiliary Functions when
Adding a Pipe or Duct Line
| Converted from CHM to HTML with chm2web Pro 2.85 (unicode) |