|
|
Framer, Floor Framing &
Rafters
|
Sheathing Properties
You can select the sheathing properties in the dialog box
displayed.
Material Code
Select from the list. The available options are
loaded from the sheathing database d_SHEETLIB. The materials in the
sheathing database need to be defined in the d_LBMAT database.
Sheet code
After selecting the material code, you can select
the sheet code from the Sheet code list. The sheet code
determines the sheet size and other properties.
Thickness
Thickness has the default value DEFAULT,
which is determined by the thickness of the sheathing layer. You
can also type another value in the field.
Set
The property defines the method of representation
and drawing properties of the sheathing in the 2D drawing and 3D
model. The set can be e.g. FLOOR, ROOF or
CEILING. The set properties are defined in the keyword group
BDSXX using the keyword sheathing_param.
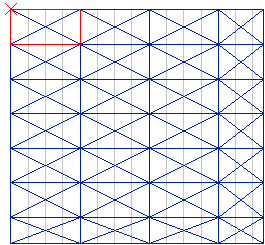
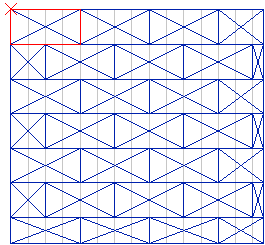
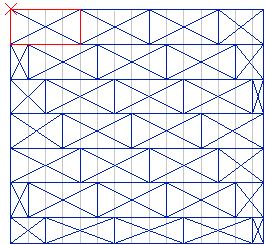
Sheathing
The property determines the position of the
seams. Select one of the following options from the list:
-
GRID - The sheets are positioned in the
sheathing area so that their seams are continuous.
-
OVERLAP - By selecting this option, you
can make the seams overlap.
-
CONTINUE - A continuous sheathing style to
minimize material waste. The sheathing seams are placed so that the
left over parts of one row can be used on the next row of
sheets.
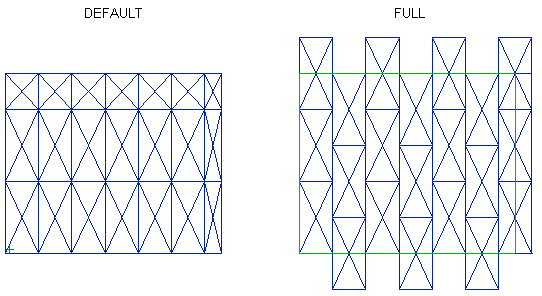
Form
The property determines how the sheets are cuts
at the edges of the sheathing area. By selecting DEFAULT
from the list, the sheets are cut according to the edges of the
area. By selecting FULL, the sheets at the edge are not
cut.
Execute
The sheathing is added when you have selected the
Execute check box. If you do not select the check box, no
sheathing will be added to the area, but you will have defined the
sheathing properties.
 Adding a
Sheathing
Adding a
Sheathing
Editing
Keywords