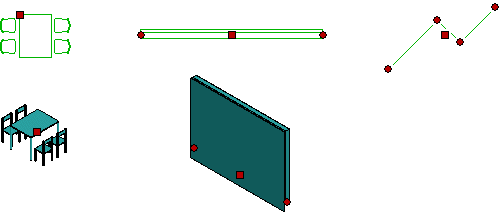
When you select a single object, the program changes its color and adds a square grip point to the default reference point of the object. When you select a wall or a profile, the square grip point is added to the center point of the object. When you select a 2D polyline, the square grip point is added to the center of gravity of the line. You can move the object by moving the square grip point.
If the object is a line, wall or profile, the program will also add round grip points at the end points of the object in addition to the square grip point. You can change the length and direction of the object by moving the round grip points. If the object is an area, the round grip points are added at the mid and end points of the edge lines. You can move the edge of the area by moving the mid-point grip, or change the shape of the area by moving the corner point grips.
If the object is a layered structure (wall, floor, ceiling, roof), you can select a particular layer by first clicking the entire structure in the model and then clicking the desired layer The selected layer will be marked in a different color. You can edit the layer by using the grip points. You can select a layer of the horizontal structure when you have expanded the structure into layers.

![]() Context-sensitive
Menu of a Grip Point
Context-sensitive
Menu of a Grip Point
![]() Cursor when Selecting a Grip
Point
Cursor when Selecting a Grip
Point
![]() Moving from the Grip Point
Moving from the Grip Point
![]() Stretching from the Grip
Point
Stretching from the Grip
Point
![]() Moving
an Opening Label
Moving
an Opening Label
| Converted from CHM to HTML with chm2web Pro 2.85 (unicode) |