|
|
DesignStream Interface + WWW
Publishing
|
Publisher
If the WWW Publishing add-on feature is available to you, you
can publish documents created during the design work in a folder or
on a printer in different file formats. If the DesignStream
Interface add-on feature is available to you, you can publish
documents to DesignStream as well.
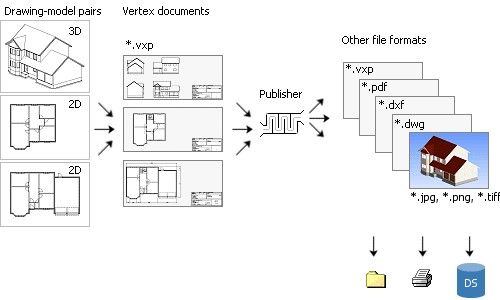
Open the Publisher dialog box in one of the following ways:
- Select File > Other Print Functions >
Publisher.
- If you are checking in a project to DesignStream, select the
check box Interactively in the Check-In to DesignStream
dialog box.
Select the documents to be published in the Publisher dialog
box.
Create a New
Document Set
- Do either of the following:
- Click the New button.
- Select an old document set from the Set name list and
click the Copy button. The documents belonging to the set
are displayed on the Files list.
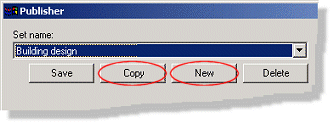
- Enter the name of the new set in the text field.
 Note
Note
- When you have added files to, or deleted files from, a set, or
edited the file properties or the publishing destination, you can
save the set by clicking the Save button.
- The sets are listed in alphabetical order. If you wish to sort
the sets in another order, open the database d_PUBLICATIONSET for
editing. You can open the database from the Windows Explorer using
the drag and drop method. Set the order numbers 0, 1, 2 etc. in the
field PUBLSETORDER. If more than one set has the same order number,
their order is defined alphabetically.
- The DesignStream system uses some of the pre-defined document
sets to automatically publish drawings of an optionalized building
model.
Add a New File to a
Document Set
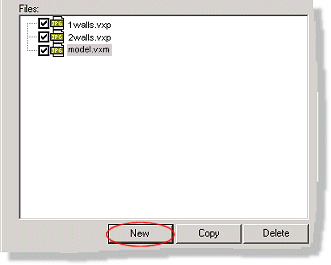
The Files list shows all documents belonging to the
document set. A document set can contain several documents, of
which you can select the documents to be published
project-specifically.
- Select a document set from the Set name list.
- Click the New button below the Files list. The
Add File dialog box opens.
- Select File.
- Select a single file by clicking the Browse button.
- Select several files at once by using the wildcard character *
in the file name. First, select one file with the Browse
button, and then edit the file name in the File field. For
example, you can select all exterior wall panels by typing
PANEL.U*.vxp or se/SE_U*.vxp (depending on the naming conventions
and saving location of panel drawing files) in the File
field. Each file will be individually published into the selected
file format.
- Select File Type.
- If the selected file is a Vertex 2D drawing or 3D model, you
can select the file type to be an image file (JPEG, PNG, TIFF), a
PDF file, a DWG or a DXF file, or a SWF file in addition to the
original file format. The program will convert a drawing or a model
file into the selected file format. The conversion is affected by
properties which you can select in the Properties list.
- If the selected file is something other than a Vertex 2D
drawing or 3D model, you must always select Original file
format as the file format.
- Confirm by clicking OK.
 Note
Note
- The same file can be present in a document set as several
different documents, all of which have different properties. You
can, for example, publish several image files with different
resolutions of the same drawing file. When you have added a file
for the first time, you can copy it with the Copy button and
define new properties for it.
Select
Document Properties
- Select a document from the Files list.
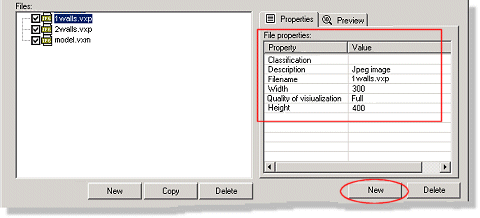
- Edit the file properties. Select a new property by clicking the
New button. Select a property from the list and define a
value for it.
 Properties of
the Document to be Published
Select Documents to be
Published
You can select which documents in the set are published. Check
or clear the check box of the desired document in the Files
list.
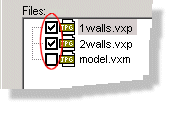
By clicking the All / None button you can
select all documents or clear all selections in turns.
Select Publishing
Destination
The publishing destination can be a folder on the user's disk or
on the network, or a DesignStream system. Check or clear the check
box of the desired destination. You can create a new destination as
follows:
- Click the New button below the Publishing
destination list.
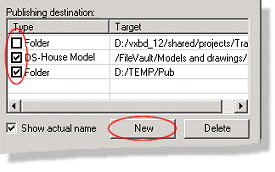
- Select one of the following from the list:
- Folder - Publish in a folder. Enter the folder path,
including the drive symbol in the text field.
- DS Project - Publish a house model, or a customer
project, designed for a certain customer in DesignStream.
- DS Product - Publish a product in DesignStream. The
product can be, for example, a model, a component or a component
group.
- DS House model - Publish a house model in
DesignStream.
 Note
Note
- The documents are published in the default folder in the
DesignStream system, defined in the PDM keyword group.
Define Printer as
a Document's Publishing Destination
You can publish individual documents on a printer. Add a new
file in the document set for the document being published on a
printer.
- Click the New button below the Files list.
- Select a file by clicking the
 button in the dialog box.
- Select one of the following as the type:
- Printer - Select the printing settings in the Printing
dialog box.
 Print
Settings
- Automatic printer - The program will automatically
choose a suitably sized sheet and the printer. Implementing this
function requires customer fitting.
- Confirm by clicking OK.
 Note
Note
- You can edit the printer or scale before publishing by
selecting the Printer or Scale properties for the
document.
Create a PDF Book
You can publish several files as a single PDF file. Define a new
PDF book and the files belonging to it as follows:
- Click the New button below the Files list. The
Add File dialog box opens.
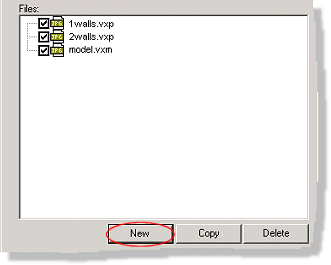
- Make the following selections in the dialog box:
- Type the name of the PDF book in the text field.
- Select PDF-book from the list as the file type.
- Confirm by clicking OK.
- Select the name of the PDF book you just added from the
Files list.
- Click again the New button. The Add File dialog box
opens.
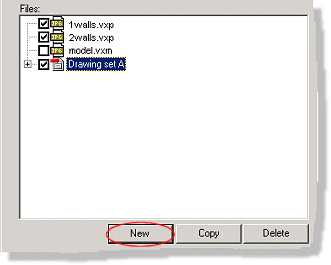
- Select a file by clicking the
 button. The default file type is PDF file.
- Repeat steps 3 to 5.
- Select the properties for a PDF book in the same way as for
other file types. In addition, you can select following properties
for a PDF book:
- Title - Type a title for the PDF book. The title will be
displayed in the PDF file's table of contents.
- Sheet - The selection list is compounded of the
alternatives defined in the system settings. In addition, you can
select the alternative OWN. If you select OWN, the sheet is
determined according to an application development program as
before. The selected sheet only affects the size of the sheet, the
selection "landscape" or "portrait" is not significant here.
- Sheet or. - Select AUTO (default), LANDSCAPE or PORTRAIT
from the list.
- Autorotate - Select 1 (default) or 0 from the list. When
you select 1, the drawing will be rotated to fit the sheet, if
necessary.
- Scale - Select Scale from sheet (the drawing will
be scaled according to the sheet) or Scale from drawing (the
drawing is not scaled according to the sheet) from the list.
 Note
Note
- You can add several files at once to the PDF book by using the
wildcard character * in the file name. For example, you can add all
the exterior wall panels to the PDF book by typing PANEL.U*.vxp or
se/SE_U*.vxp (depending on the naming conventions and saving
location of panel drawing files) in the text field in the Add File
dialog box.
Delete a Document Set,
Document, Property, or Publishing Destination
- Select one of the following:
- A document set from the Set name list.
- A document from the Files list.
- A document property from the Properties list.
- A destination from the Publishing destination list.
- Click the Delete button below the list.
Save and
Publish a Document Set
- Click the Save button. All selections you made
(documents to be published, their properties, the publishing
destination) are saved in the document set.
- Click the Publish button.
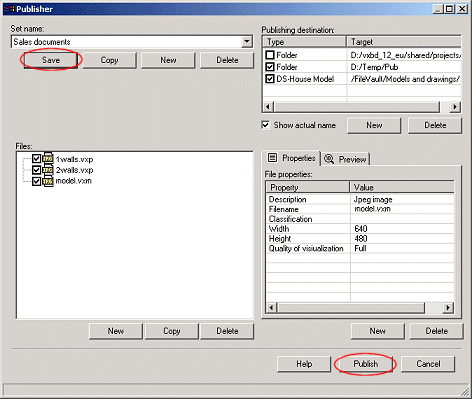
- If you are using the File > Other Print Functions >
Publisher function to publish documents, and you select the
DesignStream system as the publishing destination, you will be
prompted: Update building data to DesignStream? Select either of
the following:
- Yes - The documents will be published and the
information on the project data card will be updated to the
project's meta data in the DesignStream system.
- No - The documents will be published but the project
data will not be updated.
When you publish documents while checking in a project to the
DesignStream system, the project data is automatically
updated.
 Document Publishing when
Project is Exported into DesignStream


 button in the dialog box.

 button. The default file type is PDF file.
![]() Document Publishing when
Project is Exported into DesignStream
Document Publishing when
Project is Exported into DesignStream